
Sunday, August 15, 2010
Matching Jumpers
Tuesday, August 10, 2010
Little Girl Jumper
So I was getting out my daughters 24 month clothing and discovered that I had no dresses. A must for a little princess so I dug into my sewing closet and found this really cute fabric and jumper pattern. By the way this is a lined bodice. All seams are sewn on 5/8 in unless it says otherwise.
 |
| This is the bodice front and back lined up. |
 |
| Step 1: Sew the shoulder seams together. On both the lining and the actual bodice. |
 |
| Step 2: Sew the lining to the bodice. Sew around the neck and arm holes. Clip curves. |
 |
| Step 3: Open up the lining from the bodice. Sew the side seams together . |
 |
| Step 4: Sew the center back of the lining and bodice together. Clip corner. Turn right side out. Point out corner. Iron everything down so you get nice clean seams. |
 |
| Step 5: Sew side seams of skirt together and sew skirt center back together. Remember to serge/pink/zig zag all the raw edge seams so your skirt won't fray away in the wash (not necessary on bodice as all seams are enclosed). Also leave the top few inches of the skirt center back open for the zipper. This is why I serged each side of this seam separately and not together as I did on the side seams. |
 |
| Step 6: Sew gather stitches along top of the skirt. To sew gather stitches use a 5 stitch length (or the longest on your machine) and sew 2 rows of stitches. One at 6/8 in and one at 4/8 in or (1/2). I stop and restart at every seam and also in the center of the skirt front. I do this so there is less chance of the gather stitches breaking and ruining all the gathering you were doing. |
 |
| Step 7: Gather the skirt to fit the bodice. Pin the skirt to the bodice matching up at every seam and at the center of the front (skirt and bodice). Then you can gather in between all the pins to be even and fit. To gather take either the needle threads or the bobbin threads and GENTLY pull. Tip: for every section you gather take the end you are not pulling and wrap around a pin so your gathers don't fall off the other end. Pin as you get each section gathered to your liking. When you finish gathering a section wrap the pulled threads around a pin. Step 8: Sew the skirt to the bodice (not the lining or vice a versa depending on which one you choose) . |
 |
| Step 9: Iron the bottom of the lining (or the bodice which ever one is not sewn to the skirt) up 5/8 in(the amount you sewed the bodice to the lining). Then pin it to the skirt (this should be the opposite side from which you sewed before, thereby enclosing the waist seam). When you go to sew the seam you have a few options. If this is the front of the dress I would recommend either sewing 1/8 in from the edge or hand sewing so it is invisible. If you are just sewing the lining to the skirt then you can hand sew it so it will be invisible or you can do what I did (you will notice on this blog that I avoid hand sewing at all costs). I used the "stitch in the ditch method". I put on a blind hem foot and leave my needle in the middle. Then I sew from the front right up against the other seam, this makes the stitching from the front invisible but you risk not catching the back in all the places and it can look a little sloppy on the inside. |
 |
| Step 10: Put in the zipper. Unzip the zipper and pin one side so the fold lines up right against the teeth or a little over (whatever you want). Using your zipper foot (which requires you to move your needle, I usually move it closer to the needle) sew straight down one side. Zip up the zipper and pin the other side of back so it matches up with the other side of the back. I start from the the previous side (the end of the zipper) and sew across to the other side and then sew straight up the other side. Tip: when you get close to the pull of the zipper, put your needle in the fabric lift the presser foot and move the pull by either zipping the zipper up or down (whichever gets it out of your way for the longest time). Step 11: Hem the dress. (sorry I spaced a picture here) I typically try the dress on the individual and fold up where I want it on a side seam. Then I take the dress off measure how much I folded it up, fold it up that amount all the way around. With her dress I did a size bigger than she actually is so she can "grow into" the dress. So I hemmed it up 4 inches. I like doing a "rolled hem". Since the hem needed to go up 4 inches I fold/iron it up 2 inches all the way around then I fold/iron that over again and then sew it down usually 1/4 in from the top fold. |
Here is my princess in all her glory with her little dress on. She was being a difficult model that is why in the second picture she has a graham cracker in her hand.


Here she is full length. My favorite thing is how long this dress is. That is a problem I have with a lot of little girl dresses is they are all knee length or higher. I wanted a long dress (especially since winter is around the corner) and this can easily be layered with a long sleeved blouse.
Quilts/Blankets/Pillows
 |
| This is a quilt I made for my Young Womens Project (an LDS church thing) to take to college with me. It's just square blocks sewn together. If you look really closely the white fabric is printed with little spools of thread. |
I have made many blankets over the years but have just recently really started in on the quilting process. Before it would just be 2 pieces of fabric sew together, or the occasional square block quilt. I now have done a few more but the block quilt is still my favorite and I revert back to it often.
 |
| This blanket we lovingly refer to as "Confused". It has Scott's 2 favorite college football teams, BYU and Nebraska. It has just 2 pieces of fleece fabric serged together. It makes for a great stadium blanket though. |
 |
| This was a blanket I made to start expanding my idea of quilting. It reminds me of a back to school blanket with all the apples. This was regular quilt blocks that were slashed into triangles (like cutting a sandwich into fourths). Then we mixed up all the fabrics and sewed them together. 2 triangles together then that triangle sewed to another 2 triangles sewn section. That makes a square and then you sew squares together. That is essentially how quilting works I've discovered. Take whatever shape you have and somehow create a square and sew squares together. |
 |
| This quilt was randomly created. I was at my husbands grandparents home in St. George October 2005. My husband and his grandparents were enthralled watching some football game and I was bored. So his grandma (an avid quilter I might add) told me to go into her fabric closet and make a quilt. So I did and this was the end product. |
 |
| This was going to be quilt. I started piecing this together at a teaching conference I went to. It's a pinwheel pattern. You can kind of see it. But I never finished piecing enough together to form a decent sized quilt so I just used them as covers for preformed pillows. ( I made 2 of them) |
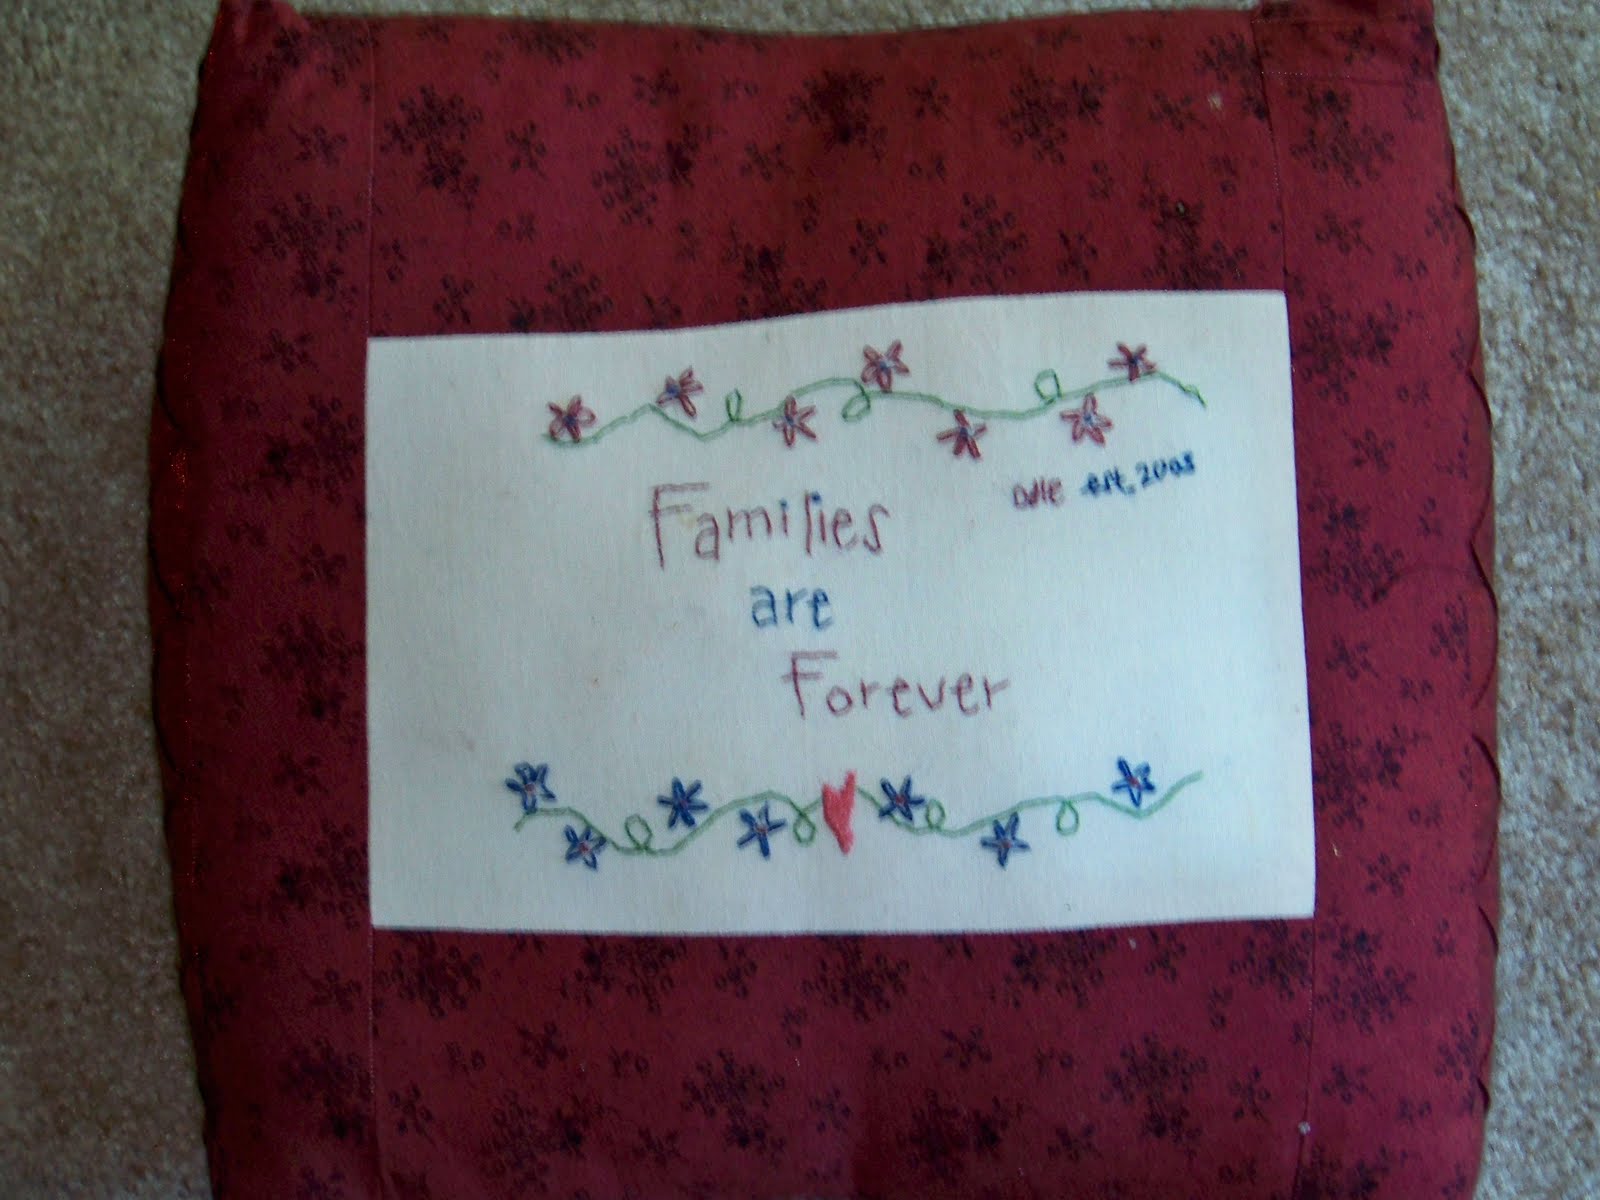 |
| This is just a piece of muslin fabric that I stitched everything in with some embroidery floss. My sister taught me how to do this. Then I just took some leftover fabric I had laying around my house and formed a pillow that I stuffed. |
 |
| This is a T-shirt quilt I made for my husband for fathers day this year (2010). It has 3 of his favorite t-shirts from high school, and then the rest of the quilt is made of Christmas pajama fabric (a tradition in his family that I carried on). |
 |
| This is by far the nicest quilt I have ever made. It is also the most time consuming. I followed a pattern for this one. The pattern was called a Trip Around the world. It is really simple in that it is just little blocks sewn together but you had to sew them together in a certain order to get the branching out effect. I loved this one so much that I even had it professionally machine quilted (a $100 expense). |
 |
| This was a cradle given to me by my mother in law. She had the foam in there already but it was covered in a fabric I really didn't care for (Sorry!!). So when I had my baby girl my husband encouraged me to just recover it. I was a little apprehensive but it turned out great and made the cradle look really cute. |
 |
| This is a bridesmaid dress I made for my sister in laws wedding. It was a plain purple fabric lining a sheer overlay. It then has a sheer white wire ribbon at the waist and hem for an added flair. We made 4 of these for all the bridesmaid to match. |
 |
| This is my daughter in her blessing dress that I sewed. She was very good a posing for the overload of pictures I took. |
 |
| This is my son in his blessing outfit I sewed. He was not so good at posing for pictures, therefore we only took a few. |
 |
| These are the Christmas Jammies I made in 2006. I made jammie pants for my husband and I. Then I made a sleeper for my son. It had feet and snapped underneath and up the front. |
 |
| These are the jammies in 2007. Again pant for my husband and I and a sleeper for my son. This had a zipper in it (much easier than snaps) and it had a collar and cuffs for the sleeves in a matching knit fabric. |
 |
| 2008 Jammies. This time I did pants for my husband, son and I. (I didn't want to make 2 sleepers) Then for my daughter I made a more interesting type sleeper. She was only 2 months old so I made her more of a sleeper sack. This has no legs it really is like a sack with arms and a zipper. |
 |
| Now we have the most recent 2009 jammies. I made a sleeper for my daughter but opted out of doing the feet and just put a cuff on the bottom of the legs and the end of the sleeves. I used the same fabric to do a collar for the neck. I did make pants for my son, myself and husband but we did Christmas by ourselves this year and therefore we don't have a picture of the 4 of us together. |
 |
| This is the dress I made for my brother in law's wedding that I included in my last post. |
Saturday, July 24, 2010
Past Projects
I thought a good way to start this blog would be to show you some of my past projects. So here are a few that I had laying around my house.
 |
| I made my husband some shorts awhile back. These shorts have no waistband (for those that don't like them). It has 2 cargo pockets with flaps on the sides and regular pockets on the top front. It also has a zipper fly and some belt loops I added last minute. |
Let's call this the dress section... I make a lot of dresses because I hate the styles in the stores and have a hard time finding ones I like in my price range therefore I make them.
 |
| This first one is fairly old. I made it when I was in high school. The top is made out of velveteen. It is an empire waist with darts and has a zipper in the back. |
 |
| OH do I love this dress. I have two (I only have one pictured) made out of this pattern. The top is a knit and the bottom can be anything you want I just picked out a light weight weight woven cotton fabric. This has a bias strip made from the skirt fabric to cover the neck line (vs a facing neck line which is the most common). I love this dress because even though there is a zipper in the back I don't use it very often. I can just throw it on over my head and I can even wear it when I'm pregnant. Another reason is the comfort it feels like I'm wearing t-shirt and it's very light weight and cool in the summer time. |
 |
| This dress I made for my bro in law's wedding reception (see picture below). I was still nursing so I needed a buttons down the front and it was suppose to be a red dress. You would think this would be an easy find.... IT WAS NOT. There were NO red dresses at all to be found. So I made this. I kinda tweaked the pattern a bit because I chose a different skirt pattern from a different dress that didn't have buttons and I added a second layer to it. This was all made from a fake satin type fabric. It has a a lapel collar (like you find on coats). The second layer on the skirt is just a see through shimmery woven fabric. It also has buttons all the way down the front. |
 |
| This is another dress I made in high school. This is also an empire waist. The bodice (top) is lined and there are buttons on the shoulders and on the sides. There are invisible pockets in the side seams of the skirt. |
 |
| This is dress is made from a heavy duty woven fabric so it will be warmer in the colder months. It's a very simple waist less dress but it does have to ties to create a waistline when wearing it. |
 |
| This dress I actually made when I was in junior high school. My sister in law purchased this fabric in Hawaii and brought it back for me. This is a A-line type jumper. It's hard to tell but there is no actually waist but it does curve in on the sides a bit then flares out at bottom. It has a V neck and buttons all the way down the front. |
 |
| My sister actually made this shirt. It's 3/4" sleeve. It has a man's shirt collar and shirt tail. The buttons go all the way down the front and the cuffs on the sleeve are split with no button. |
 |
| This is my second favorite dress I have 4 dresses made from this same pattern. This is a very simple A line dress without a waist. It is very long as it goes down to my ankles. The sleeves are cap sleeves with a zipper down the back of the dress. This dress is unique in that the sleeves are actually not created separately and sewn on. The dress is created with several long strips of fabrics widening near the bottom to create the flow in the skirt. The sleeve area is just a wider strip near the top that narrows at the waist then widens again for the skirt. |
 |
| This is a blessing outfit I made for my son when he was a baby. The top is just a shimmery crepe material with some satin fabric for the shorts and straps. It has a pointy version of pointy version of a Peter Pan flat collar. The straps are actually just decorative and are just sewn on to the front. The shorts have patch pockets on the front with mitered corners. There are 3 buttons on the back for eased getting on and off and then a strip of snaps along the crotch line for diaper changing ease. This outfit is size 3 months. |
 |
| This is my daughters blessing dress. I added a bunch of things not in the pattern for this one. The neck line is finished with a bias strip. The top is lined. There are 3 buttons going down the back. The sleeves are gathered where they attach to the dress to create the "poofy" look then they have an elastic on the end. They also have a cap sleeve on top of the sleeve but has lace attached to it. The skirt is actually about twice the size of the bodice but is gathered so it is a very full looking skirt. I added about 6" to the bottom of this skirt because I wanted it really long. The skirt also has an overlay that splits in the middle with lace on the bottom. |
 |
I also did not make this towel but have made similar ones and given them away as gifts. This is an excellent baby shower gift and gets TONS of use in our home. This is a simple hooded towel for a child. Here are the instructions: Step 1: Purchase a large regular bath towel, purchase a hand towel that matches. Step 2: Take the hand towel, fold it in half so the shorter ends meet. Sew one of the sides (the bottom being where the short ends meet) together. Take the other side and fold up then sew the edge to create a thicker and nicer looking edge. Step 3: Take the open side that is not sew together of the hand towel. Find the middle of the large towel. Match the seam you sewed on the hand towel to the middle of the large towel. Then attach the hand towel to the large towel. |
 |
| This bag I created to be my purse/diaper bag. The back is a large pocket for papers and things like that. Then on the outside on the sides are 2 pockets that I use for my cell phone. Then on the front are 2 more half size pockets. With a large flap covering the whole front of the bag. Inside the bag there are 2 more half size pockets. The whole bag as well as the pockets are lined with a simple woven cotton fabric. The outside is made of corduroy. There is a 3 inch wide strap attached with D rings to little side straps. |
 |
| These are the curtains I created for my daughters room. |
 |
| This is a close up of the fabric so you can see how cute it really is. It's a seersucker material. |
 |
| This is a shot of just one of the panels when it's out. |
 |
| This is the black out curtain I purchased from the store. It was very plain and because my daughters window faces west it gets a LOT of light. So much light that the black out curtain itself wasn't enough. So I added a whole panel of the cute seer sucker material on top of it. It gave it a cute girly look and added more darkness to the room. |
 |
| Here is the finished look. Cute if I do say so myself. |
Subscribe to:
Posts (Atom)